Tuesday, June 23, 2015

Customized Graduation Cap

After years of moving, establishing residency, trying to figure out my major, and then deciding on one (instead of doing two like I briefly tried), I FINALLY graduated on June 12, 2015!! I have about 6 months off before I go for my Bachelor's Degree, but it feels great to have this accomplishment finished. 

For the ceremony, I customized my grad cap. I added my own style and my parents were able to spot me very easily. Although the finished result looked amazing, I wouldn't recommend doing this unless you have LOTS of time on your hands. 


The finished product!

This part literally took me like 4 hours because I wasn't using tweezers and the jewels kept popping out of my hand.


Tips:

-USE TWEEZERS!! Oh for the love of all that is helpful, use tweezers. I was at work when I did mine, so I didn't have tweezers when I started and it took sooooooo long to get the jewels positioned and then glued. I'm talking HOURS just for the "J" & the "E".

-Print out letters or something to use as your guide. I was going to free-style it at first, but I am glad I decided against it. I printed the letters for my name, lightly taped them, and lined the jewels around them to create a negative space for the letters. 

 -Use fabric glue or something. I used super glue and when I look closely, I can see that the back of the jewel kinda melted because it fused with the fabric. 

-LESS is more, especially with super glue! I put too much on a few of the jewels and as soon as it hits the fabric for the cap, it spreads and darkens. Not pretty. 

-Be Patient. It took me a full work day and part of another to complete this. (I work at a law firm so at times I have lots of down time). I would highly recommend starting this early and coming back to it in phases. Otherwise you might go crazy and your eyes will start to see permanent sparkles. 

-If you can find a stick on jewel sheet that you like, definitely use it. I picked and glued EACH INDIVIDUAL jewel, and while it is gorgeous, I doubt I will be doing the same for my Bachelor's because it just took too long. (10 hours!)

Friday, April 27, 2012

Butterfly-Silhouette Paint Chip Wall Art


I absolutely love butterflies, as well as just about anything bright and colorful, so when I came across this post from Spunky Junky I was instantly inspired! It took me a while to find a butterfly paper-punch that I liked, but after some shopping around I found the Martha Stewart Monarch Double-Punch on sale at Joann's Fabrics & Crafts. It was a bit more than I wanted to pay, but it makes beautiful silhouettes and I know I will find many more uses for it over the years. After finding my paper-punch (more like in between stores), I went to Wal-Mart and literally grabbed every single Glidden paint sample. I initially picked out some select colors, but after a return trip I decided to get the rest of the colors (for more options and later projects, of course). I spent a total of about 3 or 4 hours on this project once I sat down with all my supplies, but I was also watching a movie so I was multi-tasking =). I punched out all the butterflies, bent them in half to make them lift off the paper, and then super-glued them to the poster board. I used about 20 different colors, but I made sure to use 3 butterflies of each color to keep a sort of balance. I saw a similar posting for a recycled magazine collage and it is next on my list! I had some extra butterflies and there are color guide cards that when punched out create a cool effect. Overall, I love the end result and I can't wait to do another one!

Supplies used: 
Black Poster Board
Glidden Paint "Chip" Samples 
Martha Stewart Monarch Butterfly Double-Punch
Super Glue
Black-frame (from a previous project)

I have both the big punch and the mini, but only used the big one.


I initially tried using Elmer's glue but it took too long to dry.
Folding them really helped make it seem like they are flying off the page.

The finished product!


Tuesday, April 10, 2012

Rainbow Nails

Scrolling through Pinterest one day, I found an idea for nails that involves three colors underneath, some nail tape to create a pattern, and a darker color on top. The tutorial that I originally got the idea can be found here at NailStories Instagram (there's is much neater than mine). But I am really happy for the first go around with this idea, I already have ideas for colors to do next time. The end result reminds me of Scratch Art paper...
Underneath I used :
*Sinful Colors San Francisco (dark green)
*Sinful Colors 24/7 (bright pink)
*China Glaze Yell-O-Neil (metallic yellow)

On top I used:
*Wet & Wild Heavy Metal (metallic black)

Monday, January 16, 2012

My DIY: Chalkboard Paint Wine Glasses

      A friend of mine is trying to get her Premier Jewelry business launched, so I agreed to help her out by hosting a party. I recently moved to a new apartment (okay, it's been a couple months) and haven't had much time for getting my girlfriends together so I am excited to play hostess, get together, drink wine, and look at jewelry. I previously saw a Pinterest post about Chalkboard Wine Glasses and have been super excited for the chance to do this project, and the Premier party is the perfect excuse for me to make my own!
     I was originally going to make a dozen glasses, but I was thinking about how much (or rather, little) cabinet space my apartment has and decided to go with a baker's dozen instead. I bought the glasses from the Dollar Tree because although the glasses are not the highest quality, they are actual glass, look nice, and are perfect for this project. When I was checking out at the Dollar Store, my debit card wasn't working for some reason (even though I definitely have money), and the lady behind me paid for my stuff! I insisted it wasn't necessary and was going to come back with cash but she paid anyways. Super sweet, definitely the highlight of my week! I quickly went to the bank and back to try and repay the lady, but she was already gone (which I figured, but I tried anyways). After that super awkward turned awesome moment, I bought some chalkboard paint from Home Depot. They have a chalkboard paint that you can tint to a select 12 colors, and I thought that purple (my favorite color) or something might be cute, but I also wanted a color that would fit multiple occasions, so I decided on basic black. I had the thought of buying the tint-able chalkboard paint and doing multiple different colors myself at home, but after speaking with the lady at the paint counter, I was informed that the colors they mix into the paint are special types of dyes and not easy to mix or get off skin. 
     After getting my supplies, I covered my counter in newspaper (The Boise Weekly, to be precise. An actual newspaper would have been better because the pages are larger), and laid everything out. The supplies are simple: Wine glasses, chalkboard paint, cookie sheet covered in parchment paper, sponge-brush, and disposable plastic bowl. I used a re-usable container that I had from the small side dishes (like mashed potatoes) at KFC and it was the PERFECT size. I filled the paint just a tad too much, but with the size of that container, I was able to dip the base of the glass all the way in and touch the bottom and it covered to just above the bump on the glass where the base meets the stem. I highly recommend using this same container (remember, the small side from KFC, like if you were to order a single-person meal) because it seriously was the prefect size for holding the paint and dipping the glasses. Even if you don't eat that type of food, recycle it from someone else or find a container of a similar size. After dipping the glasses into the paint, I let it drip back into the bowl and used the sponge paint brush to wipe off the excess. It still left paint on the bottom, but only a thin layer so it didn't dry funny and make the glasses stand uneven, plus that part is going to be set onto a counter or something anyways. Once there was a fairly even coat of the paint on the base, I put the glasses onto the parchment-covered cookie sheet (you can always just lay parchment paper onto a couple layers of newspaper and skip the cookie sheet as long as the surface is flat) and let them sit for about 20-30 minutes. While they sat there, the excess slid off and created a weird little pool around the base of the glass, so I made sure to move them to a fresh piece of parchment paper so that they could dry smooth all around. I let them sit overnight and the next morning they were completely dry and looked great! There are a couple rough spots where excess paint dried, but overall they look awesome and I can't wait to use them.


Saturday, January 14, 2012

DIY: Bathroom Accessory Votives

As a girl, I have many daily essentials that if unorganized can become cluttered and messy. For a while, I had some old jars that I had covered in tissue paper holding my q-tips, hairbands, etc. Even though they were cute, the jars weren't the same shape or size, and the tissue paper I used on it didn't match one another. All in all, I got bored with my previous creation and decided to make something different. I was going to re-cover the jars in matching tissue paper, but my steam for that project seems to have been lost so I moved onto something else. I recently bought myself a new hot-glue gun (okay, the same day I did this project, I couldn't wait lol), got some glass stone accents, square-shaped glass candle holders, and went to town. I started out in vertical rows of 4 and alternating the positioning, then I found that working around it from the bottom up produces a nicer look. The blue one is pretty, but my least favorite because it was the first one I did and my "trial and error" one. The green ones are my favorite, I am glad I saved those stones for last.  I will probably go get another candle holder and green or clear stones, make another one to match, and then use the blue one for an actual candle. No real loss or waste necessary. :) I can even use them all for candles once I am bored with them as organizers for my bathroom stuff, but I don't think that will happen for a while. Although I have a few blistered fingers from stones that flipped as I was placing them and sealed themselves onto my finger instead of the glass, this project was fun and I love my new bathroom organizers.


Definitely my favorite

Wednesday, January 11, 2012

No squeezing required

     Working in a call center at Hewlett-Packard, I encounter a lot of angry people throughout the day. I get yelled at constantly for things that are out of my control, mistakes the customer made, or whatever, yet I get the short end of the stick on the matter. "I understand you just work there and it's not your fault," is what I hear sometimes from people right before they pierce my eardrum. I try not to let it bother me because, after all, I do only work there, but it's hard not to let the yelling increase my stress level. So I have tried to help reduce that by bringing a heart-shaped stress ball to work to squeeze when I feel my blood pressure rising. It works a little, but the problem with that is I find my left hand hurts by the end of the day and I don't want to end up like Hanson from "Scary Movie 2" and his "strong hand". I decided to ditch the stress ball and just deal with it until I saw a post about a mind jar from a pin on Pinterest. I love love love glitter and anything that sparkles, so when I saw this I had to try it.

      I re-purposed a jar that I had from some of my mommy's homemade peach jam (yummy) and went to town. Like the original post instructs, I used glitter glue, loose glitter, and hot water mixed together. I started by adding the glitter glue so I could swirl that around and get it to dissolve. After that, I put some of the glitter into the water (I used the remainder of a tube that I used to cover Christmas lights for Apothecary Jars) and continued to add more glitter glue until it was at the desired consistency. I didn't measure, so I wouldn't be able to give you an exact amount, but I would recommend to add a little at a time until the glitter falls at a slow enough rate for you. (The glue thickens the water, so the more that is in there, the slower the glitter falls.) Once I had added enough glitter glue, I got a little glitter crazy and decided to add a bit more loose glitter so that there was more in there to swirl around. That was a mistake, but I guess you could call it a happy mistake because it just meant that I add to use a larger jar and add a little more glitter glue to thicken it up a bit. I added a couple drops of blue food coloring so that the entire thing was blue, but it probably could have done without the dye. After testing it out a bit and deciding I was happy with the consistency and amount of sparkle that swirled around, I made sure the top was secured tightly and wrapped it in duck tape. I have quite a few different designs of tape to choose from, but I decided on light blue with white polka dots because it is adorable and the color matches the glitter. I will probably re-tape the lid so it looks a bit nicer, but all-in-all I love the end result! Now to take it to work and test it out... 

I have lots of glitter and glitter glue to choose from...

I narrowed it down to blue and purple because I love both those colors...

I finally chose blue because I feel like I am looking into the ocean and I love it

I cut the glitter glue tube so it was easier to squeeze out.


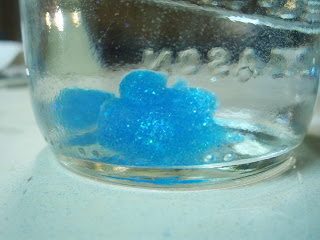
This is how it looked without the glue dissolved into the water. The glitter fell quickly once under the surface of the water.
I added some silver glitter-glue, too. 


Once the water/glue mixture was fairly thick, I could put the glue on top without it sinking into the mix quickly.

This is a gif, but I don't think it shows the animation...

I love tape.
This is what it looks like all shaken up.


This is what it looks like after settling for about 10 minutes. The water is thick enough so it is sort of gel-like but still moves the glitter easily.